When working on a Django Rest Framework (DRF) project, integrating it with PostgreSQL provides a robust backend for your application. This guide walks you through setting up Django Rest Framework with PostgreSQL on a Mac, creating a local folder for your project, and pushing the code to GitHub.
Step 1: Set Up Your Development Environment
1.1 Install Homebrew
Homebrew is a package manager for macOS. Open your terminal and run:
/bin/bash -c "$(curl -fsSL https://raw.githubusercontent.com/Homebrew/install/HEAD/install.sh)"
1.2 Install Python
Check if Python is installed:
python3 --version

I am using 3.13 while installing this project.
If not, install Python via Homebrew:
brew install python
1.3 Install PostgreSQL
Install PostgreSQL via Homebrew:
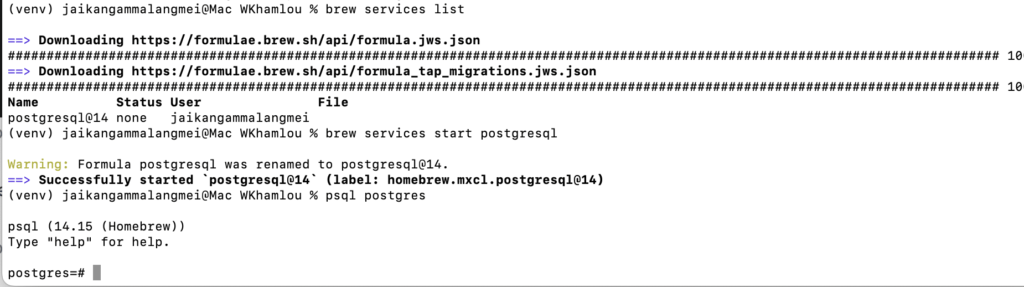
brew install postgresql
Start PostgreSQL:
brew services start postgresql
Verify PostgreSQL installation:
psql --version

I am using version 14.15 while installing this project.
Step 2: Create a Local Project Folder
2.1 Create a Folder on Your Mac
Create a folder named WKhamlou in your desired directory. For example:
mkdir WKhamlou
cd WKhamlou
2.2 Set Up a Virtual Environment
Inside the WKhamlou folder, create a virtual environment:
python3 -m venv venv
source venv/bin/activate
I am using venv as the name of the virtual environment.

Step 3: Install Django and Django Rest Framework
3.1 Install Django and Django Rest Framework
Install Django and DRF, along with PostgreSQL dependencies:
pip install django djangorestframework psycopg2-binary

3.2 Create the Django Project
Run the following command to create a Django project named todopress:
django-admin startproject todopress .

This will create a folder structure like this:
WKhamlou/
│
├── venv/              # Virtual environment
├── manage.py         # Django’s command-line utility
└── todopress/        # Project folder
    ├── __init__.py
    ├── asgi.py
    ├── settings.py   # Main configuration file
    ├── urls.py       # URL configuration
    └── wsgi.py
Step 4: Add an App to the Django Project
4.1 What Is a Django App?
A Django app is a modular component of a project. Each app handles a specific feature or functionality, such as a blog, user authentication, or in our case, a “to-do list”. Apps are reusable and can be added to multiple projects. For our project todopress, we will create an app called todo, which will handle all functionality related to managing to-do items.
4.2 Create the App
Run the following command to create the todo app:
python manage.py startapp todo

This will create the following folder structure:
WKhamlou/
│
├── venv/
├── manage.py
├── todopress/
│   ├── settings.py
│   ├── urls.py
│   └── ...
└── todo/
    ├── migrations/   # Database migrations
    │   └── __init__.py
    ├── __init__.py
    ├── admin.py      # Admin interface
    ├── apps.py       # App configuration
    ├── models.py     # Database models
    ├── tests.py      # Unit tests
    └── views.py      # Business logic
4.3 Register the App in settings.py
Add the todo app to the INSTALLED_APPS section in todopress/settings.py:
INSTALLED_APPS = [
    #default_apps
    'django.contrib.admin',
    'django.contrib.auth',
    'django.contrib.contenttypes',
    'django.contrib.sessions',
    'django.contrib.messages',
    'django.contrib.staticfiles',

    #django_rest_framework
    'rest_framework',

    #Add_on_Apps
    'todo',
]
4.4 Why Modular Apps Are Important
By creating modular apps, you keep your project scalable and maintainable. For example, if you decide to add features like user authentication, notifications, or a calendar, you can create separate apps for each feature. This structure helps in organizing code and makes it easier to work collaboratively with other developers.
Step 5: Configure PostgreSQL with Django
5.1 Create a PostgreSQL Database
Start PostgreSQL if not yet started
brew services start postgresql
Log into PostgreSQL:
psql postgres
Create a database and user:
CREATE DATABASE todopress_devdb;
CREATE USER dev_user WITH PASSWORD 'Password2024';
GRANT ALL PRIVILEGES ON DATABASE todopress_devdb TO dev_user;
Exit PostgreSQL:
\q
5.2 Update settings.py
Modify the DATABASES section in todopress/settings.py:
DATABASES = {
    'default': {
        'ENGINE': 'django.db.backends.postgresql',
        'NAME': 'todopress_devdb',
        'USER': 'dev_user',
        'PASSWORD': 'Password2024',
        'HOST': 'localhost',
        'PORT': '5432',
    }
}
Step 6: Apply Migrations, Create a Superuser, and Log In to the Admin Panel
6.1 Apply Migrations
Run the following commands:
python manage.py makemigrations
python manage.py migrate
6.2 Create a Superuser
Create a superuser to access the Django admin panel:
python manage.py createsuperuser
6.3 Start the Development Server
Run the development server:
python manage.py runserver
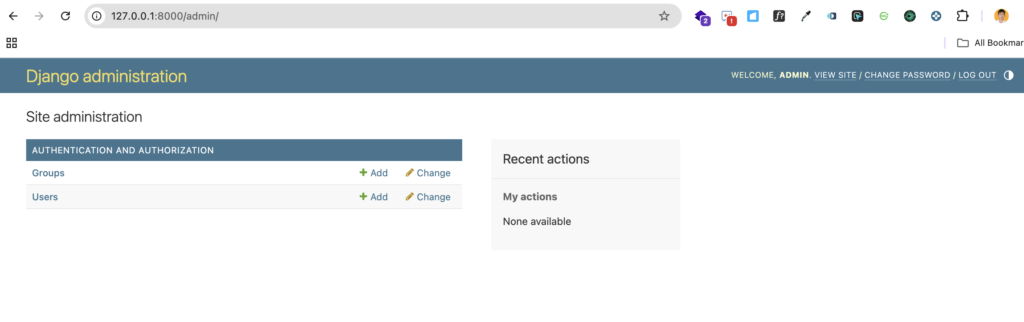
6.4 Log In to the Admin Panel
Open your browser and go to http://127.0.0.1:8000/admin/. Use the superuser credentials to log in.
Step 7: Initialize Git and Push Code to GitHub
7.1 Initialize Git
Inside the WKhamlou folder, initialize Git:
git init
git add .
git commit -m "Initial commit"
7.2 Push Code to GitHub
- Create a new repository on GitHub.
- Link the repository:
git remote add origin <repository_url>
git branch -M main
git push -u origin main
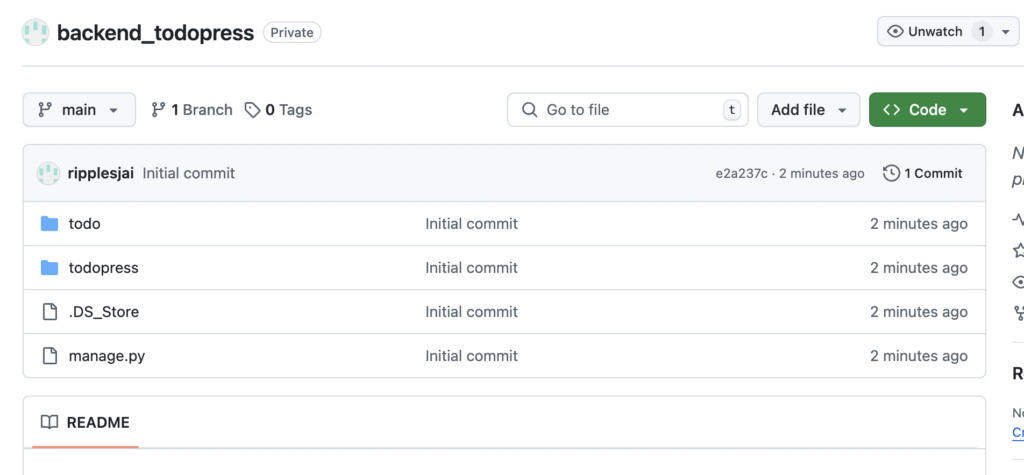
Code is now on Github.
Conclusion
In this guide, we created a Django project named todopress and added a modular app called todo. We also configured PostgreSQL, created a superuser, and pushed the code to GitHub. With this structure, you can easily add more apps to your project for additional functionality, making your application scalable and maintainable.
